リモコン戦車を作るわけですが、リモートコントロールを何でするか?というのが次のテーマです。
ここでは赤外線センサを使った基礎的な受信機を作りたいと思います。
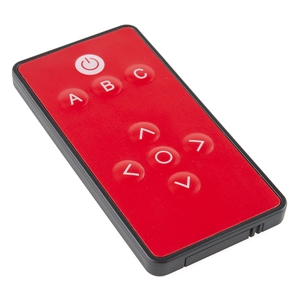
送信側のリモコンはTVのでも何でもよいのですが、ここは電子工作っぽくこれ↑を使います。赤のボディーがモチベーションを上げますね!
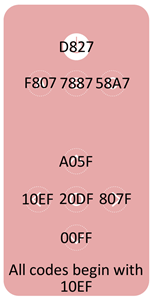
このリモコンのボタンと16進コードのマッピングを示します。ボタンを押下すると対応するコードが出力されます。
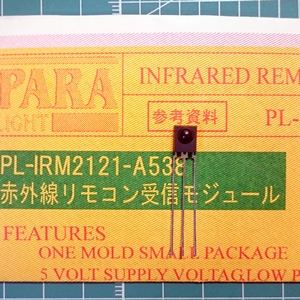
受信側の赤外線センサはこれ↑を使います。過去に秋月電子で100円だったのですが今では廃盤です。代替品があると思うので、似たようなもので代替してください。

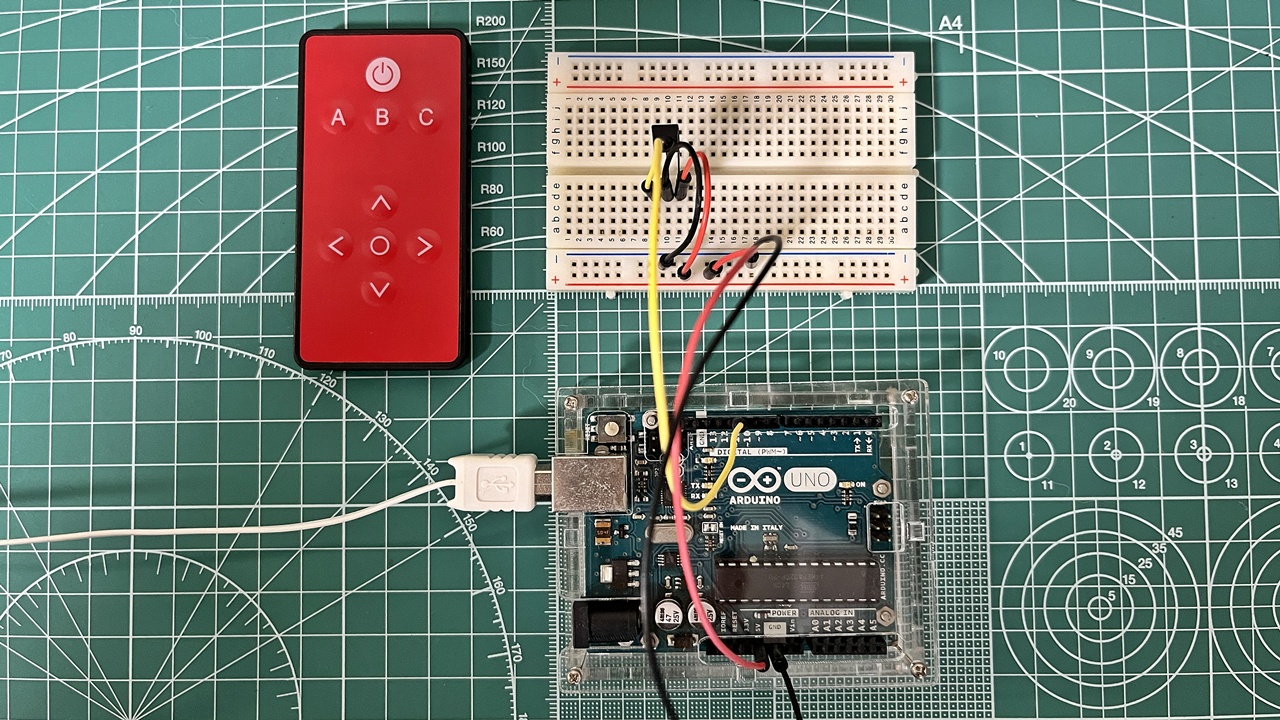
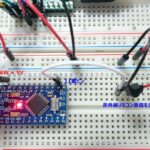
Arduinoとの結線図を示します。
/*
  SparkFun Electronics 2013
  Playing with Infrared Remote Control

  IR Receiver Breakout (SEN-8554): Supply voltage of 2.5V to 5.5V
    Attach
    OUT: To pin 11 on Arduino
    GND: GND
    VCC: 5V

  This is based on Ken Shirriff's code found on GitHub:
  https://github.com/shirriff/Arduino-IRremote/

  This code works with cheap remotes. If you want to look at the individual timing
  of the bits, use this code:
  http://www.arduino.cc/playground/Code/InfraredReceivers
*/
/*******************************************************************************
赤外線リモコン(SparkFun COM-11759)受信 サンプルプログラム
++++++ note ++++++
・赤外線リモコンを押下したときにボタンに対応したコードをコンソール画面に表示するプログラム

*******************************************************************************/
#include <IRremote.h>

int RECV_PIN = 11;
IRrecv irrecv(RECV_PIN);
decode_results results;
#define POWER 0x10EFD827
#define A 0x10EFF807
#define B 0x10EF7887
#define C 0x10EF58A7
#define UP 0x10EFA05F
#define DOWN 0x10EF00FF
#define LEFT 0x10EF10EF
#define RIGHT 0x10EF807F
#define SELECT 0x10EF20DF

void setup()
{
  Serial.begin(9600);
  irrecv.enableIRIn(); // Start the receiver
}

void loop()
{
  if (irrecv.decode(&results))
  {
    if (results.value == POWER)
    {
      Serial.println("POWER");
    }
     if (results.value == A)
    {
      Serial.println("A");
    }
     if (results.value == B)
    {
      Serial.println("B");
    }
     if (results.value == C)
    {
      Serial.println("C");
    }
     if (results.value == UP)
    {
      Serial.println("UP");
    }
     if (results.value == DOWN)
    {
      Serial.println("DOWN");
    }
     if (results.value == LEFT)
    {
      Serial.println("LEFT");
    }
     if (results.value == RIGHT)
    {
      Serial.println("RIGHT");
    }
     if (results.value == SELECT)
    {
      Serial.println("SELECT");
    }
    irrecv.resume();
  }
}
Arduinoのスケッチです。サンプルプログラムに少し手を加えました。オリジナルはこちら↓です。 IR Control Kit Hookup Guide – SparkFun Learn↗
********************************************************************************
Thank you for using the IRremote library!
It seems, that you are using an old version 2.0 code / example.
This version is no longer supported!

Upgrade instructions can be found here:
 https://github.com/Arduino-IRremote/Arduino-IRremote?tab=readme-ov-file#convert                                                                                                                                                             ing-your-2x-program-to-the-4x-version

Please use one of the new code examples from the library,
 available at "File > Examples > Examples from Custom Libraries / IRremote".
Start with the SimpleReceiver or SimpleSender example.
The examples are documented here:
 https://github.com/Arduino-IRremote/Arduino-IRremote?tab=readme-ov-file#example                                                                                                                                                             s-for-this-library

Or just downgrade your library to version 2.6.0.

Thanks
********************************************************************************
※スケッチ実行時の注意事項です↑。
IRremoteライブラリのバージョンが2.8.1以上(2025年10月現在では4.5.0)では実行に失敗します。
本当は最新のライブラリに合わせてスケッチを修正するが筋なのですが、ここではライブラリバージョンを2.6.0にダウングレードしてコンパイルして実行させています。
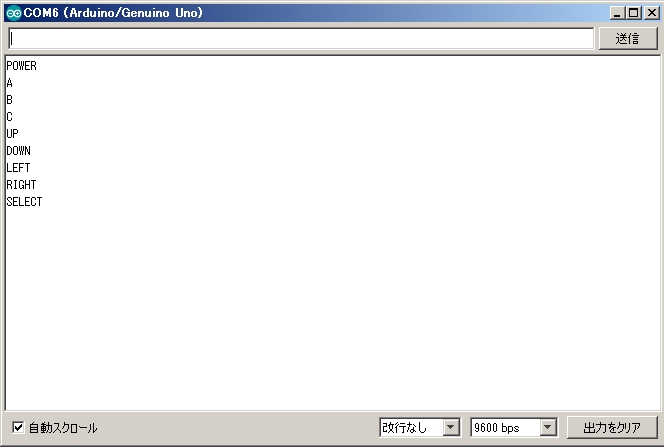
スケッチをコンパイルして動作させてみます。リモコンのボタンを押下してシリアルモニタに対応する表示が出れば成功です。

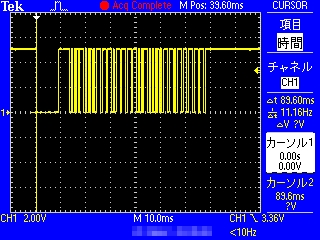
デジタルオシロで撮った波形を掲載します。
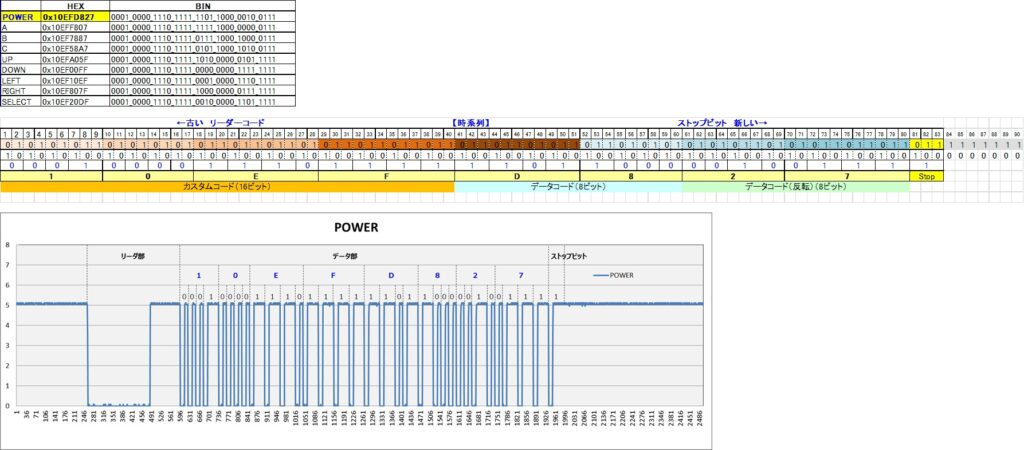
リモコンからの出力波形の一例です。

コメント